The Unreal Engine Asset Registry is a vital component of game development, serving as a centralized repository for digital assets. It simplifies workflows by allowing developers to easily search, locate, and import assets, saving time and effort. The Asset Registry promotes collaboration by providing insights into asset dependencies and facilitating seamless sharing and version control. With its tagging and labeling capabilities, developers can efficiently organize and categorize assets based on custom criteria, improving asset reuse and maintenance. Additionally, the Asset Registry aids in asset optimization, eliminating redundant resources and enhancing performance. Overall, the Asset Registry is an indispensable tool that enhances efficiency, collaboration, and creativity in game development. Let’s take a look at one possible use of the Asset Registry: Dynamic menu generation using all of the assets from a folder at runtime.
Step 1: Import Textures
- Import several textures into a folder in your project. Take note of their location. Mine are in Textures/Paintings.

Step 2: Create the Image Widget
- Create a widget in the Content Browser and open it.
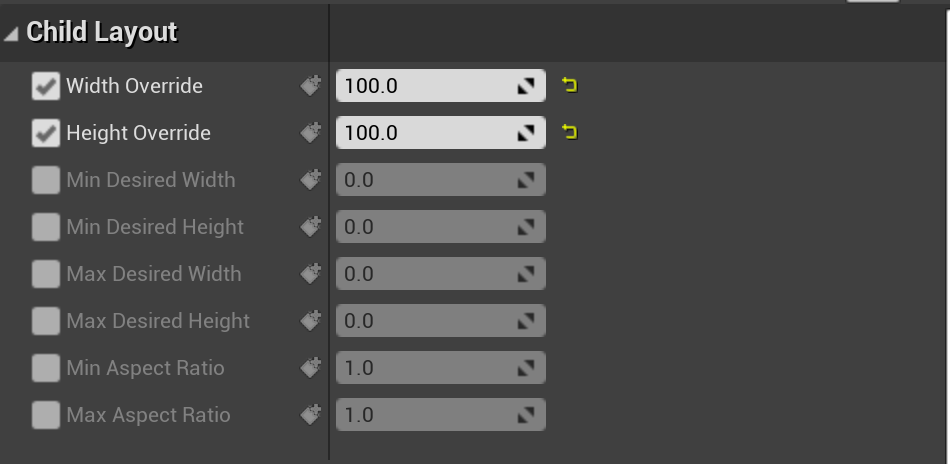
- Delete the Canvas Panel and instead drag in a Size Box. Tick the Width Override and Height Override and set them to 100.
- Drag in a new Image on top of the Size Box. Set its Anchor and position to fill all.

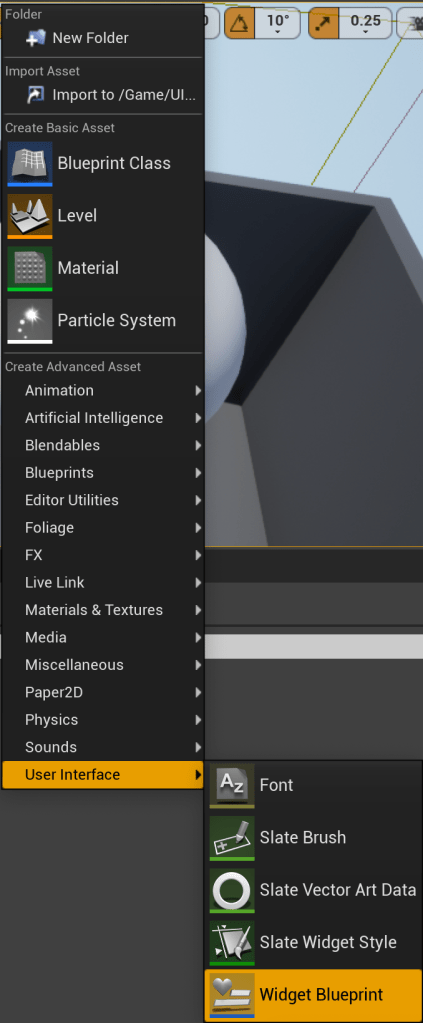
Step 3: Create the Main Widget
- Right click in the Content Browser and create another new Widget, then open it.
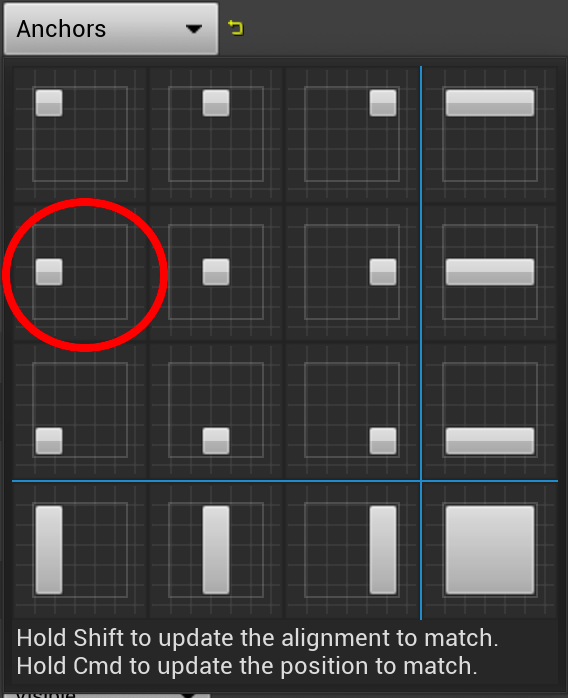
- Create a new Scroll Box and set its anchor and position to middle left.
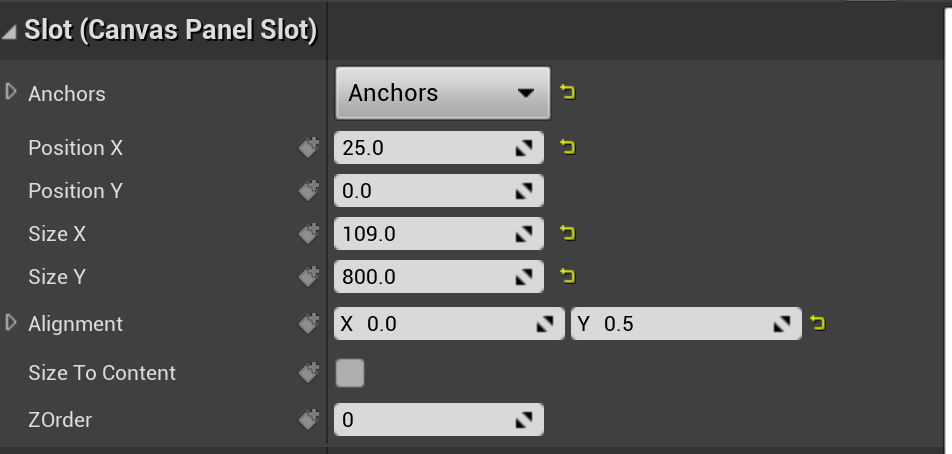
- Set its position x to 25, size x to 109, and size y to 800.
- Tick the “Is Variable” check box to make the Scroll Box a variable.

Step 4: Using the Asset Registry to Spawn Images
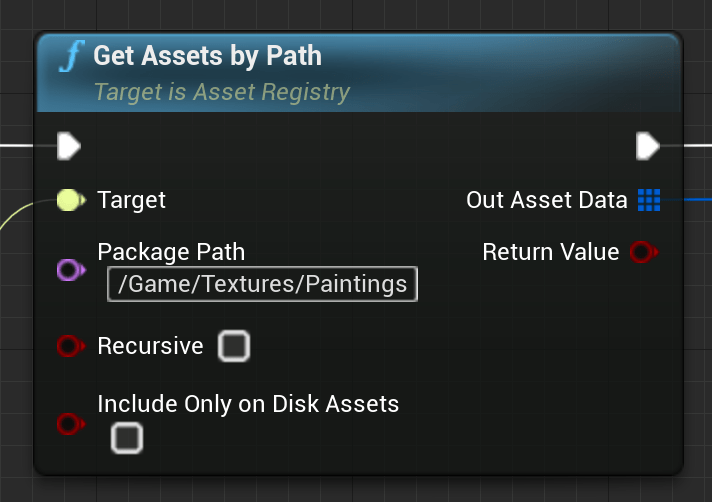
- Right click in the Event Graph and create a new Get Asset Registry node.

- Pull out a pin from the Get Asset Registry node and create a Get Assets by Path node. Connect it to the Event Construct node.

- We need to tell this function where we want to search for assets. Start with /Game/ – this represents the Content folder. Then, add the rest of the location where the textures are located. Mine are located in Textures/Paintings. So my full Package Path will be /Game/Textures/Paintings.
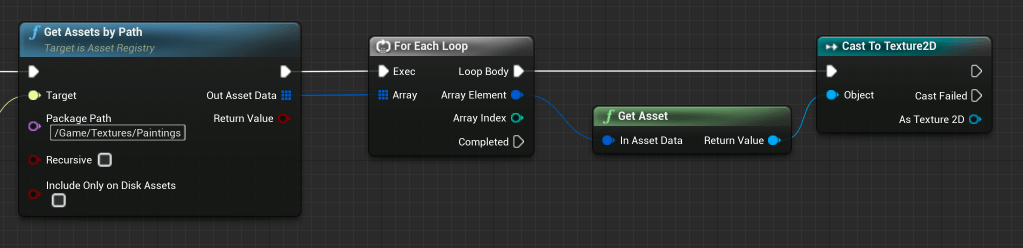
- Connect the Get Assets by Path to a For Each node, then from the Array Element, connect a Get Asset node. Then, Cast that to a Texture2D.
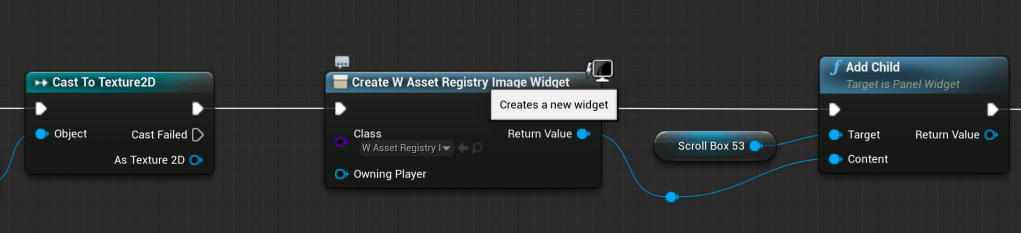
- From the Cast node, put a Create a Widget node and choose the Image widget you created in Step 2. Pull in the Scroll Box and create an Add Child node. Connect the Image Widget to the input.
- Get the Image from the Image Widget and create a Set Brush node. Set the Image Size to 100×100 and connect the Cast to Texture2D output to the In Brush Image. This will assign the images from the textures folder to each of the newly created images and set their sizes to 100×100.

Step 5: Spawn the Widget
- Open the Level Blueprint.

- Create a Create a Widget node and choose the main Asset Registry widget. Connect a Player Controller to the Create a Widget node. Connect the Create a Widget node to an Add to Viewport node. Compile and close the Level Blueprint.

- Press play and you should now see the Scroll Box populate with all of the images from your texture folder!

You can use the Asset Registry to populate all manner of items. It is a great base for all sorts of automation pipelines or procedural generation, and can greatly speed up workflow for populating when there are a ton of assets to utilize. Experiment with the Asset Registry to speed up your workflow and process!

Leave a comment