
In this tutorial, we will walk you through the process of creating a render target with a depth-based alpha in the Unreal Engine. This technique allows you to render objects with transparency based on their depth in the scene, giving you precise control over how objects are displayed. By following these step-by-step instructions, you will be able to incorporate depth-based alpha effects into your Unreal Engine projects.
Step 1: Create the Render Target
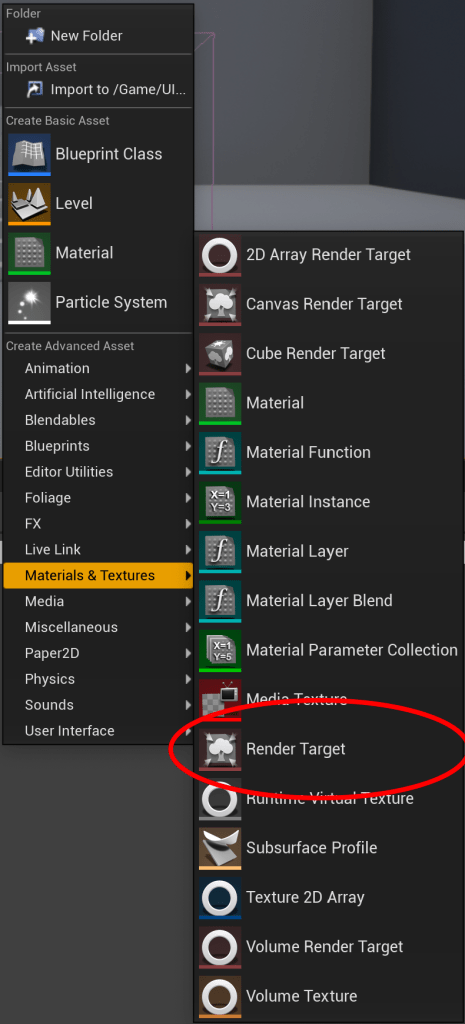
- Right click in the Content Browser and go to Materials & Textures, and create a new Render Target. Rename it whatever you wish.
- Double click on the new Render Target and change the size to 1024×1024. This is the size of the texture that you will be creating. The size determines how expensive it will be to render, and also the quality of the image rendered.

Step 2: Create 2D Scene Capture
- Search for a Scene Capture 2D actor and pull it into the scene. Move it away from everything else.
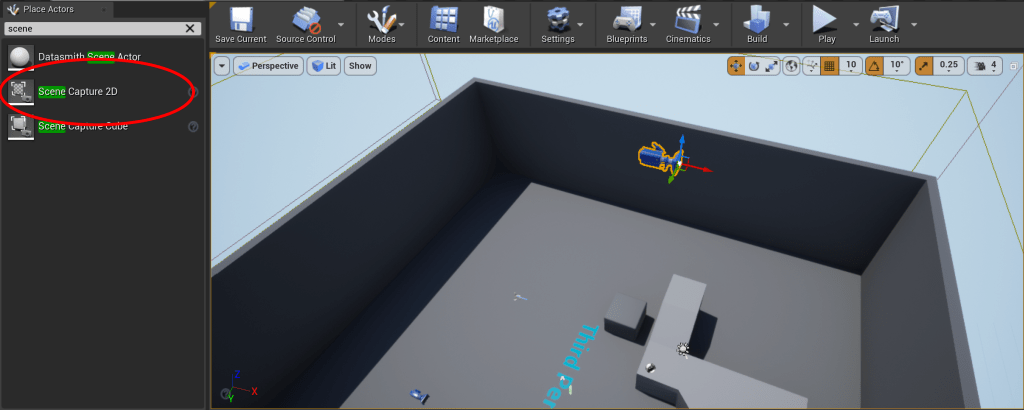
- Search for a Sphere actor and put it just in front of the Scene Capture 2D actor.

- Click on the Scene Capture 2D actor and click on Texture Target. Select the Render Target created earlier.

- Under Capture Source, choose “SceneColor (HDR) in RGB, SceneDepth in A”.

Step 3: Create the Material
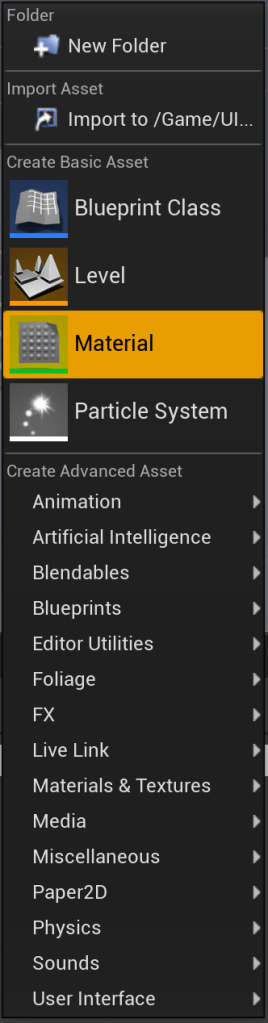
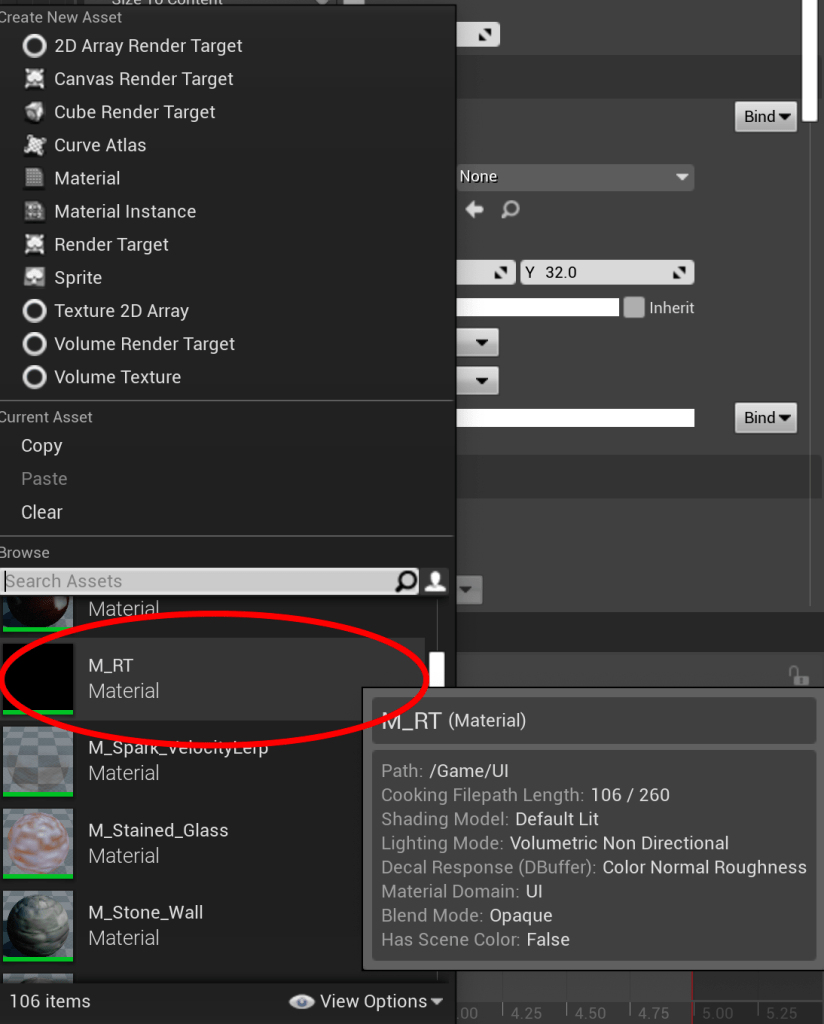
- Right click in the Content Browser and create a new Material.
- Open the new Material and drag the Render Target from the Content Browser into the Material.

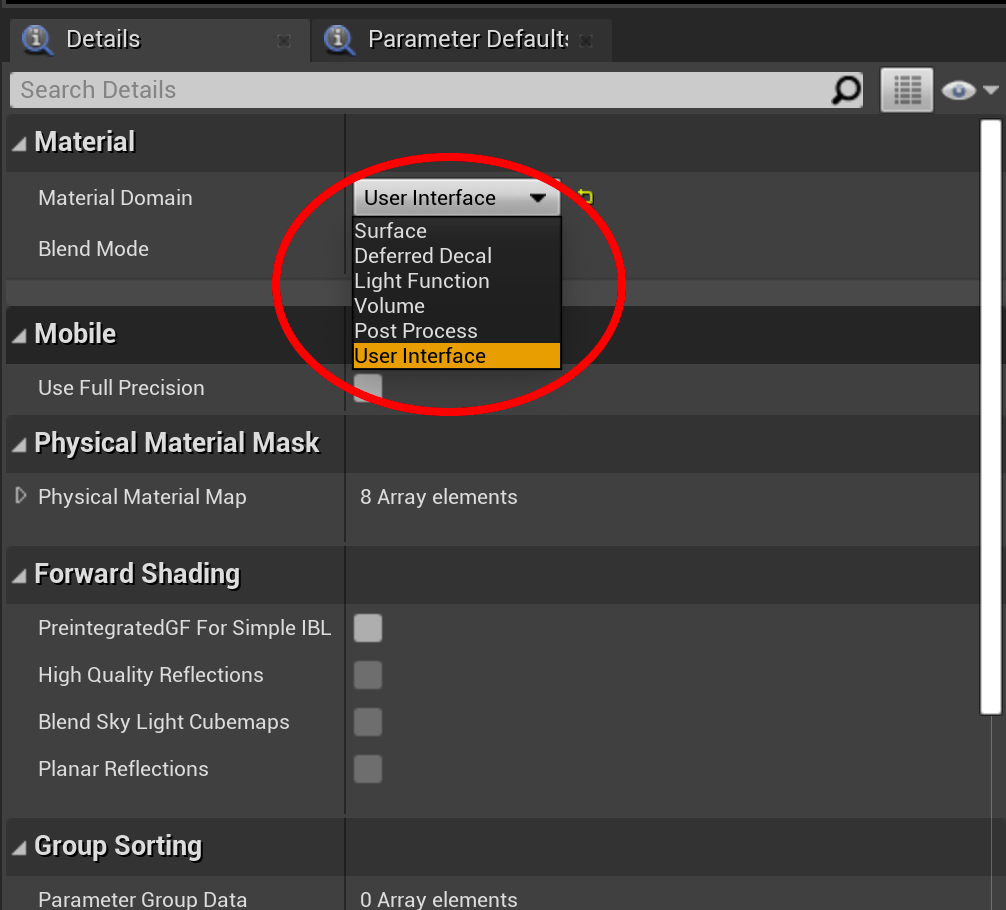
- Change the Material Domain to User Interface.
- Change the Blend Mode to Masked.

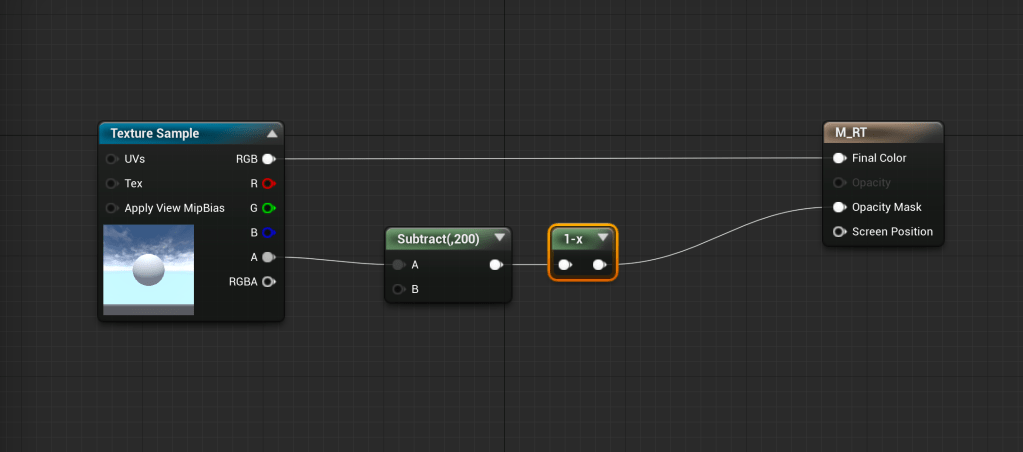
- Connect the RGB to the Final Color of the Material.

- Now let’s create a black and white mask based on the depth. Create a Subtract node and connect it to the Alpha of the Render Target. Depending on how far away your sphere actor is from the Scene Capture 2D actor will determine how much you will need to subtract from the Alpha. My Sphere is 150 units away from the Scene Capture 2D actor, so I am going to subtract 200. From the Subtract node, connect a One Minus node, and then connect that to the Opacity Mask of the Material.
Step 4: Create a Widget to Display the Render Target
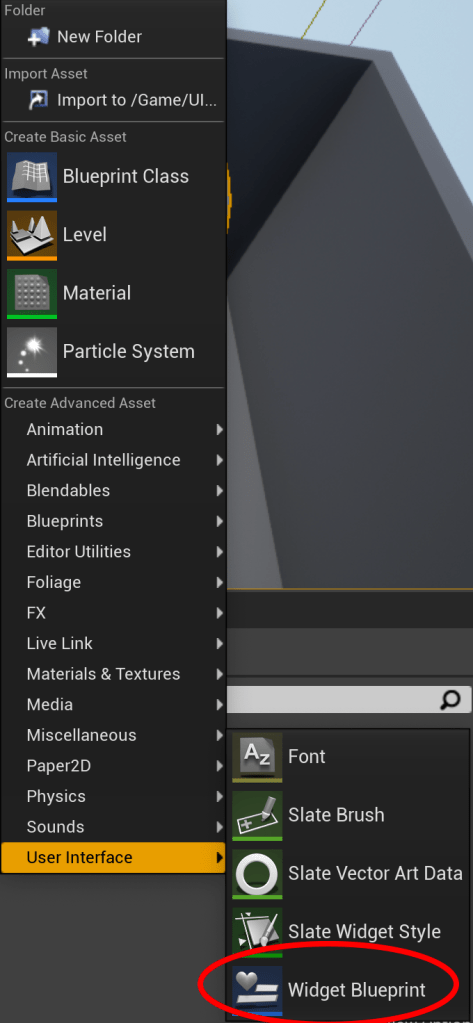
- Right click in the Content Browser and create a new Widget. Open it up.
- Create a new Image widget and set it to the top left corner. Set the size to something large that will show the Render Target. I put 700×700.

- Change the Image to the Material that was created earlier.
Step 5: Add the Widget to the Viewport
- Open the Level Blueprint.

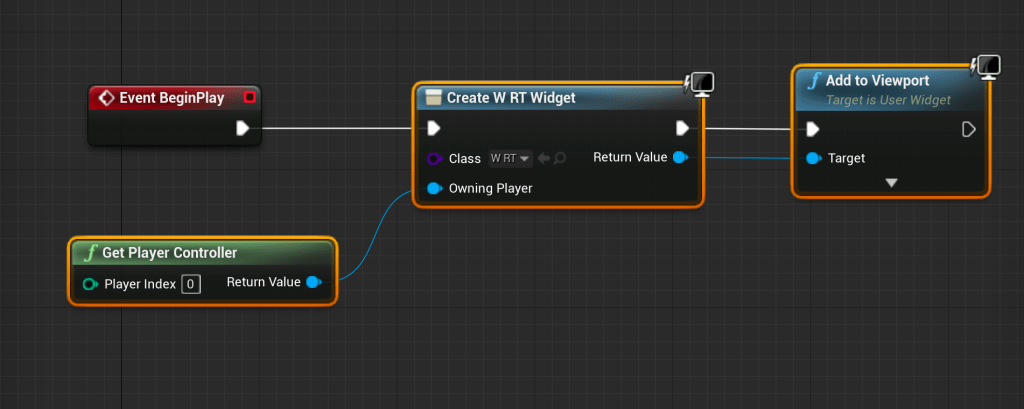
- Get the Player Controller and connect it to a Create Widget node. Choose the Widget we just created as the Class.
- Connect the Create Widget node to an Add to Viewport node.
- It should look like this:
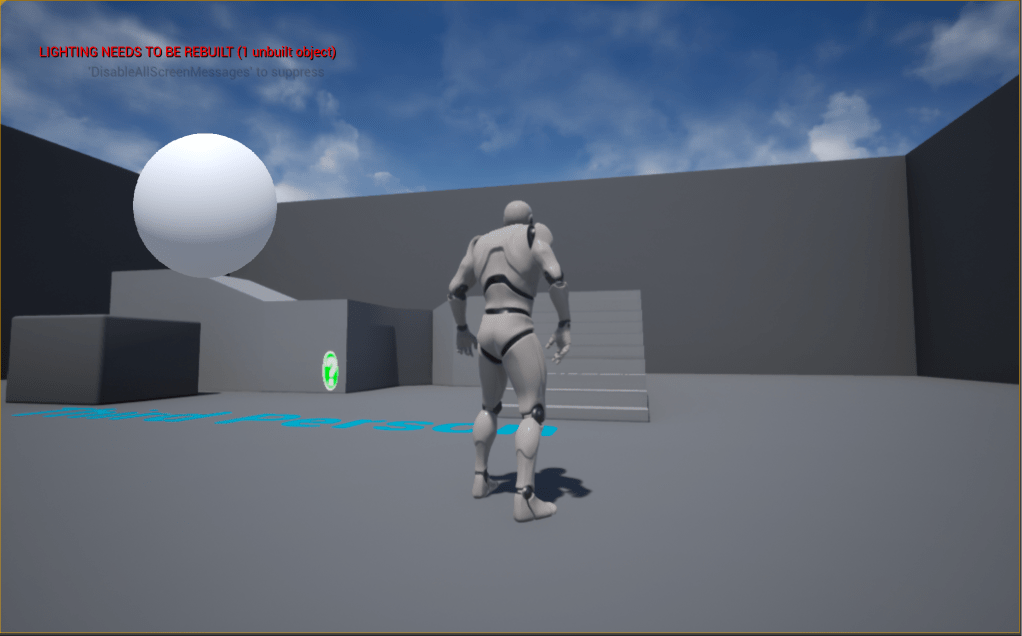
- Press play. You should now see the sphere being rendered in the top left of the screen. If you aren’t seeing anything, go through and make sure that all of the materials, blueprints, and widgets are compiled and try again.
Render Targets are very powerful and can be used for a multitude of purposes, including minimaps, picture in picture, runtime data driven materials and textures, custom cameras and viewports, and much, much more. Experiment and see what else you can come up with!

Leave a comment