User Interface (UI) materials in Unreal Engine are a very powerful way of creating visually appealing and interactive user interface elements. They enable customization, consistent styling, dynamic feedback, animations, and theming. UI materials provide the flexibility to design visually stunning UI elements that enhance the overall user experience in games, virtual reality experiences, and interactive applications.
Step 1: Creating the Material
- Right click and create a new material in the content browser. Double click on it to open it.

- In the details panel of the material, open the “Material Domain” panel.
- Choose the “User Interface” material domain.
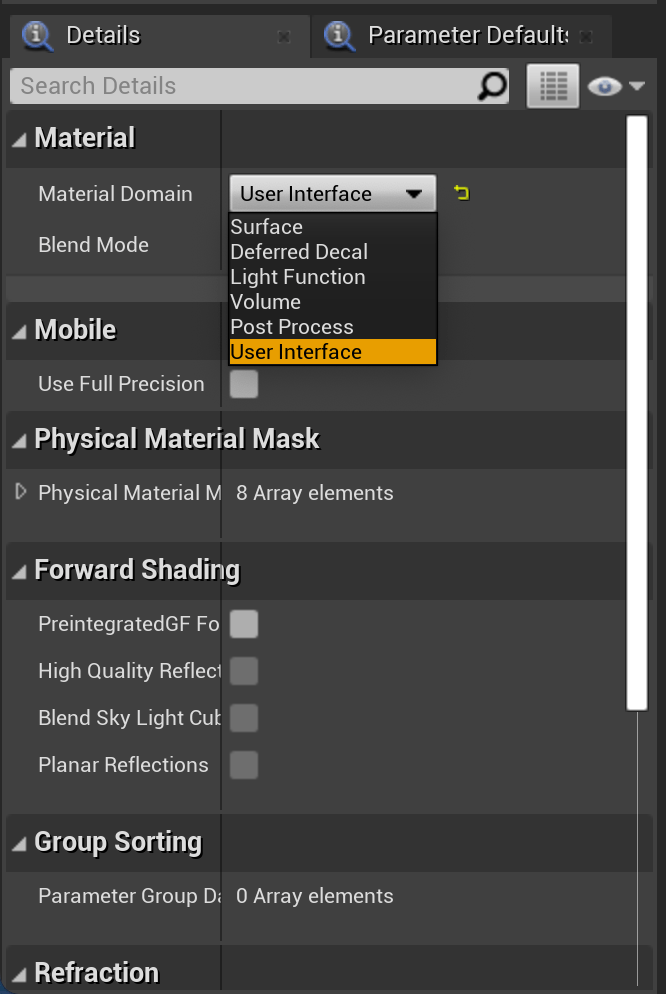
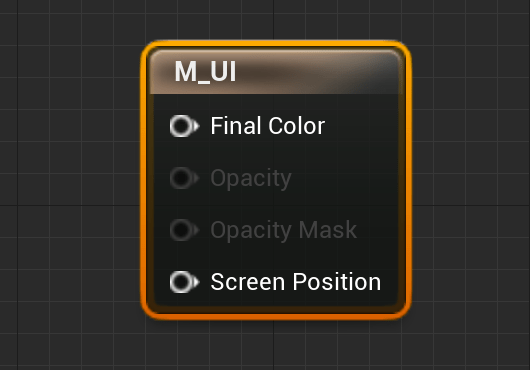
- You will see the material node change into a User Interface material node.
Step 2: Creating a Widget and assigning the new material
- Right click and create a new widget in the Content Browser. Double click the new widget to open it up.

- Create a new Image by searching for it in the Palette panel and dragging it into the Viewport. Set its size to 500×500.

- Click on the image and in the details panel, open the Brush section and click on the Image dropdown.

- Search for the new material and choose it.

- You are now using the User Interface Material in your widget!

Step 3: Creating a radial slider
- Go back to the material and open it up.
- Create a Texture Coordinate node, a Scalar node, and a Custom Rotator node. Connect the Texture Coordinate to the UVs of the Custom Rotator node. Set the Scalar parameter to 0.25 and connect it to the Rotation Angle of the Custom Rotator node.
- Connect the Custom Rotator node to a subtract node and set the second value of the subtract node to 0.5. Create a Vector2 node and set the values to 1, -1. Connect the subtract and Vector2 nodes to a multiply node.
- Connect the multiply node to a Vector To Radial Value node.
- Connect the Vector Converted to Angle output to an Add node. Create a new Scalar parameter called “Percentage” and hook it up to the other side of the Add node. Set the default value of the Percentage parameter to 0.75.
- Finally, connect the Add node to a Floor node.
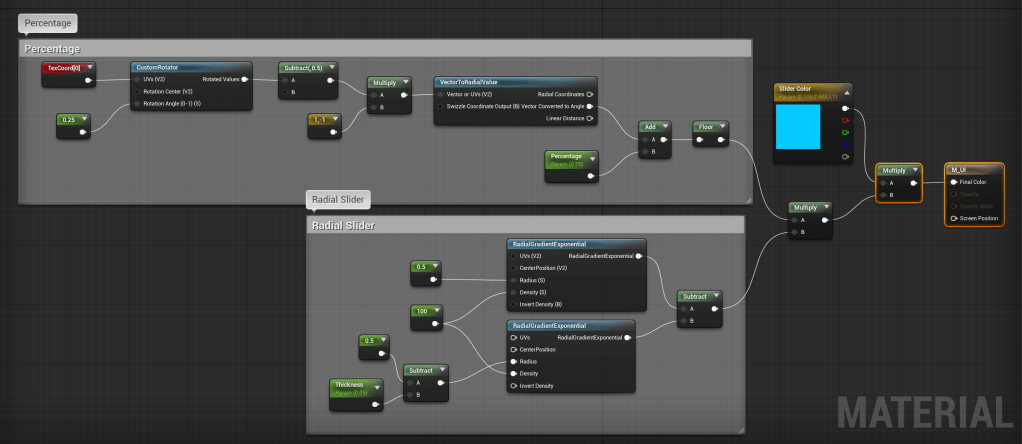
- All in all, the Percentage graph should look like this:

- Next, let’s create the radial slider.
- Create four scalar nodes, and convert one to a parameter and call it “Thickness.” Set the first scalar to 0.5 and connect it to a Radial Gradient Exponential node, in the Radius input. Connect a second scalar to the Density input and set its value to 100.
- Create another Radial Gradient Exponential node and connect the second scalar to its Density input as well.
- Create a subtract node and hook up the third scalar and scalar parameter to either side. Set the scalar value to 0.5 and the Thickness parameter default value to 0.05.
- Connect the subtract node to the Radius input of the second Radial Gradient Exponential node.
- Create a subtract node, and connect both Radial Gradient Exponential nodes to it.
- Overall, it should look like this:

- Let’s finish up the material.
- Create a multiply node and connect the Percentage nodes to the top, and the radial slider nodes to the bottom.
- Create a Vector4 node and convert it to a Parameter called “Base Color”. Set it to whatever color you want the slider to be.
- Create a multiply node and connect the Base Color parameter to the top and the other multiply node to the bottom. Finally, connect the multiply node to the Final Color of the material node.
- Overall, it should look like this:

- Now our material graph is finished. The entire node tree should look like this:
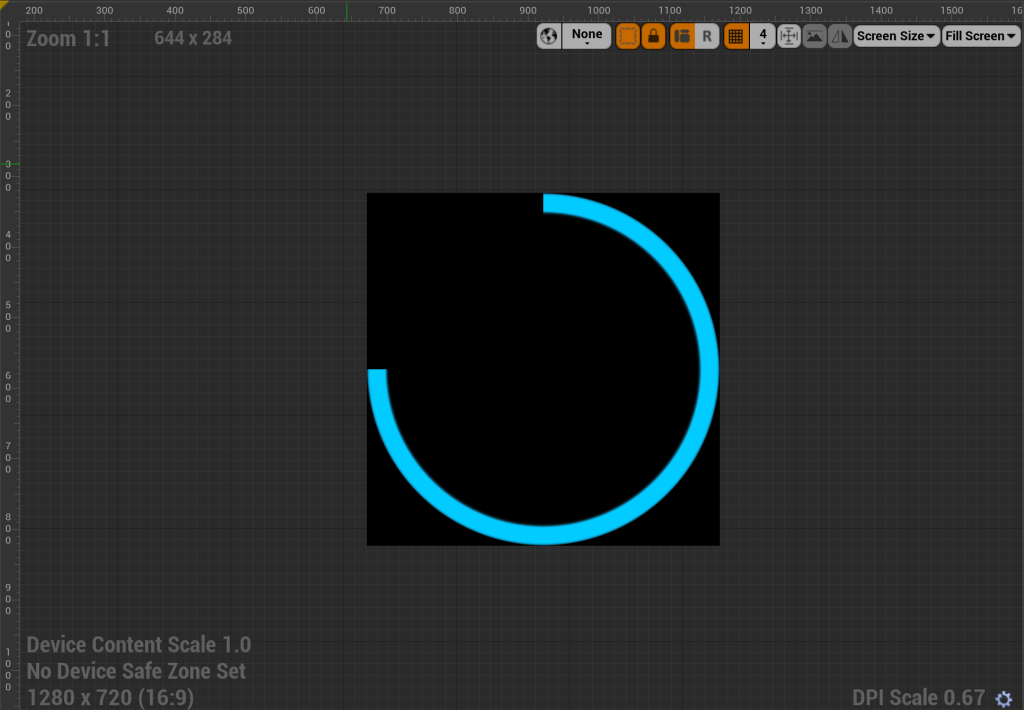
Now if we go back to our Widget, we can see the created UI Material.

Step 4: Changing the radial percentage over time
- Go to the Graph Editor of the widget.
- After the Event Construct node, Create a Dynamic Material Instance. Select the UI Material as the Parent. Promote the Dynamic Material to a variable and call it “MaterialUI”.
- Get the Image from the Designer mode and pull it into the graph.
- Pull a wire from the Image node and Set Brush. Right click on the In Brush input and Split the Struct Pin.
- Connect the MaterialUI node to the In Brush Image of the Set Brush.
- Get the MaterialUI variable, and create a Set Scalar Parameter Value node. Change the Parameter Name to “Percentage” and change the Value to 1.
- Overall, it should look like this:

- Create a new float variable called “Percentage”.
- On the Event Tick node, pull out a pin from the Delta Time and connect it to a Divide node. Change the secondary value to 20.
- Connect the divide node to the bottom of a subtract node. Pull in the Percentage variable and connect it to the top of the subtract node.
- Pull in the Percentage variable and this time Set it. Connect the execution pin to the Event Tick node and connect the subtract node to the input of the Set node.
- Pull in the MaterialUI variable and connect it to another Set Scalar Parameter Value node. Change the Parameter Name to “Percentage” and connect the Set Percentage variable node to the Value of the Set Scalar Parameter Value node.
- Overall, it should look like this:

Step 5: Add the Widget to the screen and test
- Open up the Level Blueprint.
- Get the Player Controller and connect it to a Create Widget node. Change the widget class to the Widget we created and connect the Create Widget node to the Begin Play event.
- Connect the Create Widget node to an Add to Viewport node.
- Overall it should look like this:

- Go back to the main editor and press play.
- You should now see the Widget appear on the screen and the radial slider slowly start to rotate down.

We have now created a User Interface (UI) Material and utilized it in a Widget! As you can see, there are an endless amount of options for utilizing these materials. You can utilize the entire Material Editor to create stunning UI elements for your widgets. Connect Texture alphas to customize animations and special effects! Play around with it and see what else you can create!

Leave a comment