Introduction: In game development, organizing and structuring code is crucial for efficient and maintainable projects. Unreal Engine provides a powerful feature called class inheritance that allows developers to create a hierarchy of related classes. Inheritance is a characteristic of object-oriented programming which provides an incredible amount of control and structure to projects. In this article, we will explore how and why to utilize class inheritance in Unreal Engine, using the example of creating a hierarchy of items. By leveraging class inheritance, you can save development time, enhance code reusability, and maintain a clean and organized project structure.
Why Use Class Inheritance?
- Code Reusability: Class inheritance enables you to reuse common functionality across different classes within the hierarchy. By defining core functionality in a base class, you can inherit and extend that functionality in derived classes. This saves time and effort by avoiding redundant code and allows for easy updates and modifications.
- Maintenance and Scalability: Class inheritance promotes maintainability by providing a clear structure for managing and updating related classes. Changes made to the base class automatically propagate to all derived classes. Additionally, adding new functionality to the base class ensures it becomes available to all derived classes, making your project more scalable.
- Organization and Clarity: Creating a hierarchy of classes through inheritance enhances the organization and clarity of your project. With a well-structured inheritance system, it becomes easier to locate and understand the code associated with specific functionalities. This improves collaboration among team members and facilitates future modifications.
Creating an Item Hierarchy
Step 1: Base Class: Item Actor
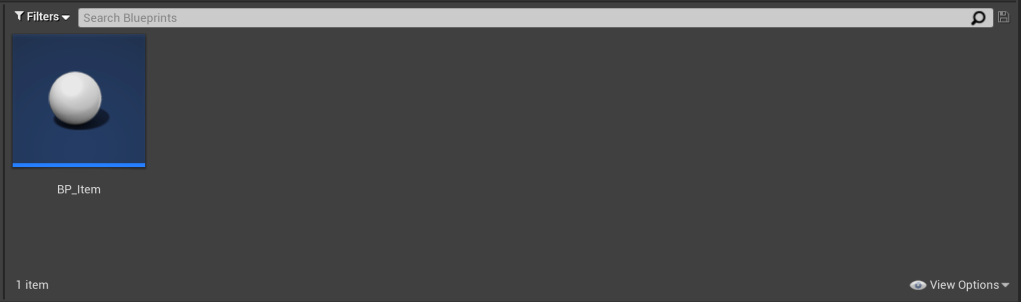
- In the Unreal Editor, go to the Content Browser.
- Right-click and create a new Blueprint class.
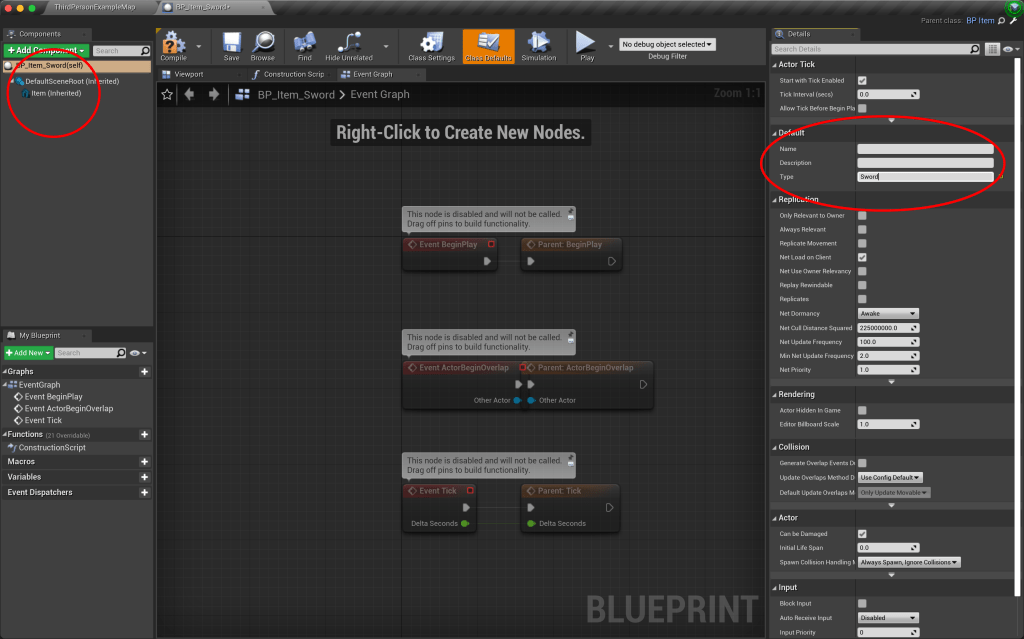
- Choose “Actor” as the parent class and call it “BP_Item”.
- Open the Blueprint Editor of the newly created blueprint.
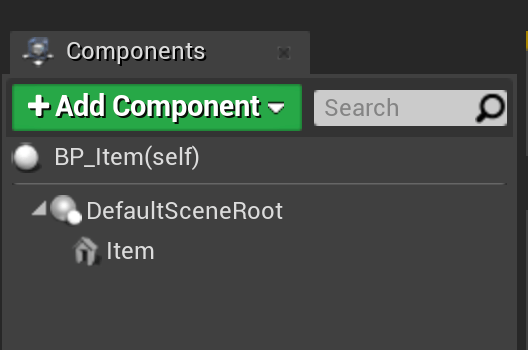
- All of our items will have a mesh attached, so add a static mesh component. Rename it “Item”.
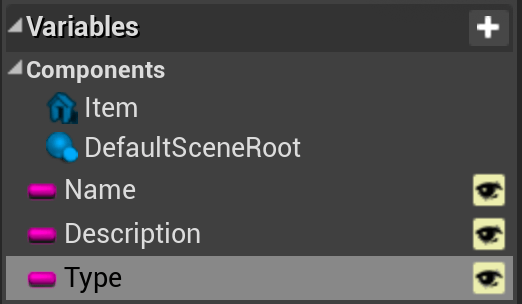
- All Items are also going to have a name, a description, and a type, so create three new string variables and name them “Name”, “Description”, and “Type”. Make them all visible.
- Compile and save the blueprint.
Step 2: Derived Class: Sword Actor
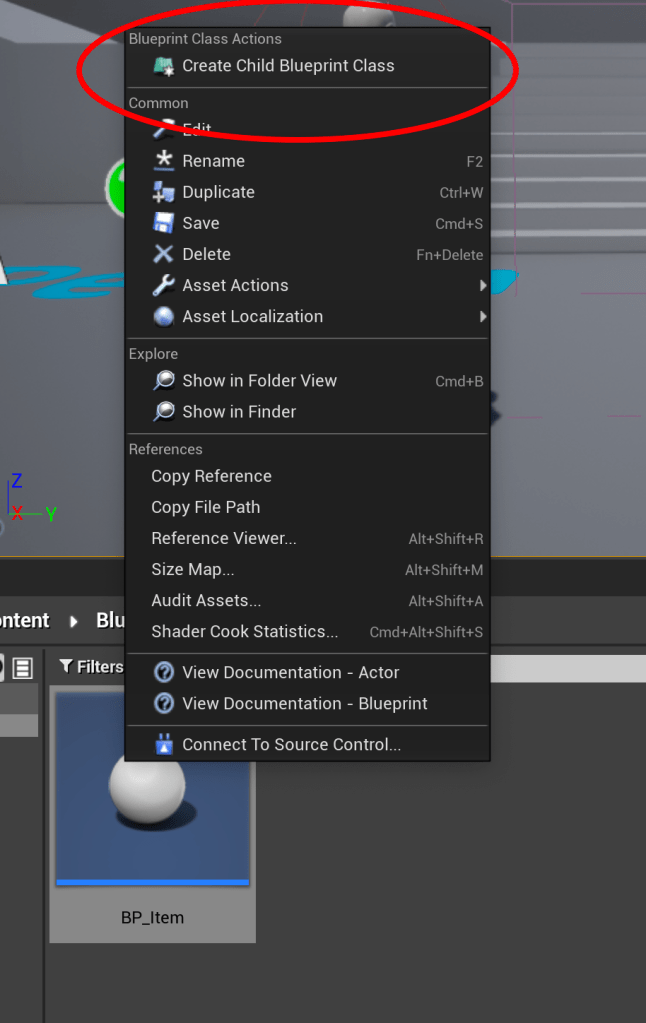
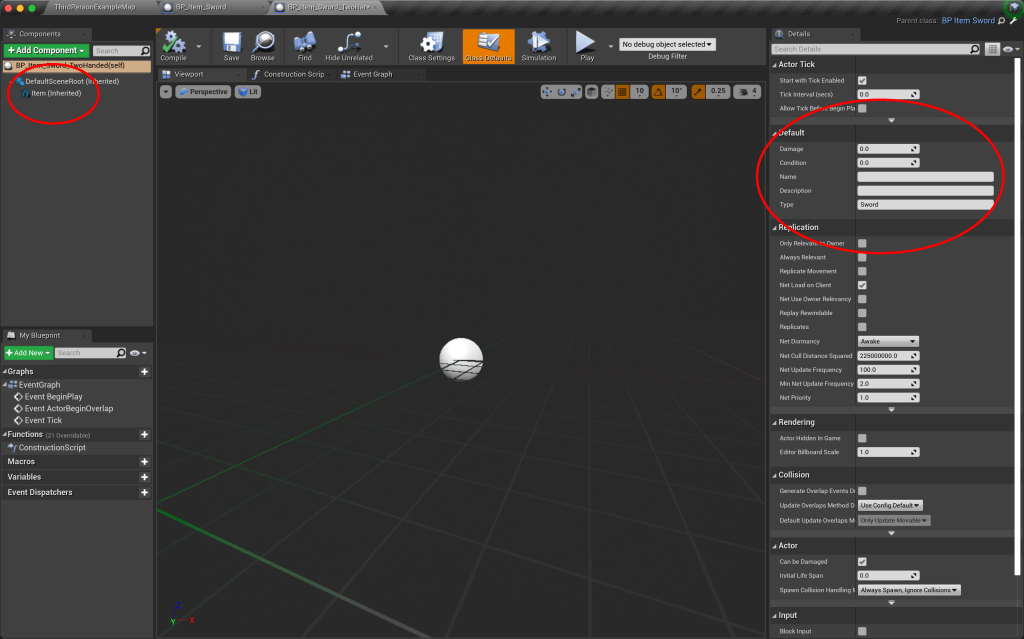
- Right-click on the “BP_Item” blueprint and choose “Create Child Blueprint Class”. Name the new blueprint “BP_Item_Sword”. It’s good to come up with a naming convention to keep track of inheritance. I suggest using the base class, followed by underscore, followed by the new derived class name.
- This new derived class will now inherit everything from the base “BP_Item” class. If you open up the blueprint, you can see that it already contains a static mesh component. Now, we don’t see the “Name”, “Description”, and “Type” variables in the variables section. So where are they? They are now a part of the parent class, and so now will be available to set in the Class defaults section. The “Name” and “Description” will be unique to each item, but we know that every type of sword will be just that, a sword. So in the “Type” variable, we can put “Sword”.
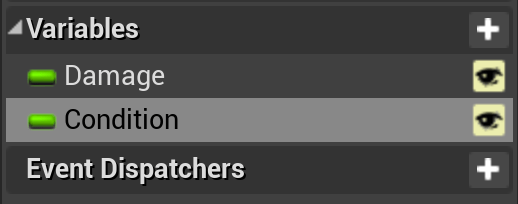
- Next let’s add specific variables unique to swords. We will add a new float variable called “Damage” and another float variable named “Condition”. Make them both visible.
- Compile and save the blueprint.
Step 3: Derived Class: Two-Handed Sword Actor
- Next we will make the specific item. Right click on the “BP_Item_Sword” blueprint and choose “Create Child Blueprint Class” and rename it to “BP_Item_Sword_TwoHanded”. Open it up.

- Now if we click on the Class Defaults, we can see that the three Base class variables are there, and also the two Sword class variables as well.
- Now we can add our specific item variables. The “Name” variable is “Two-Handed Sword”, and the “Description” variable can be “A large, two-handed sword that will cleave your enemies in twain.” Damage can be 20.0 and Condition can be 100.0.
- We can also set the static mesh component now. I used the sword from the Free Fantasy Weapon Sample Pack available on the Epic Marketplace.
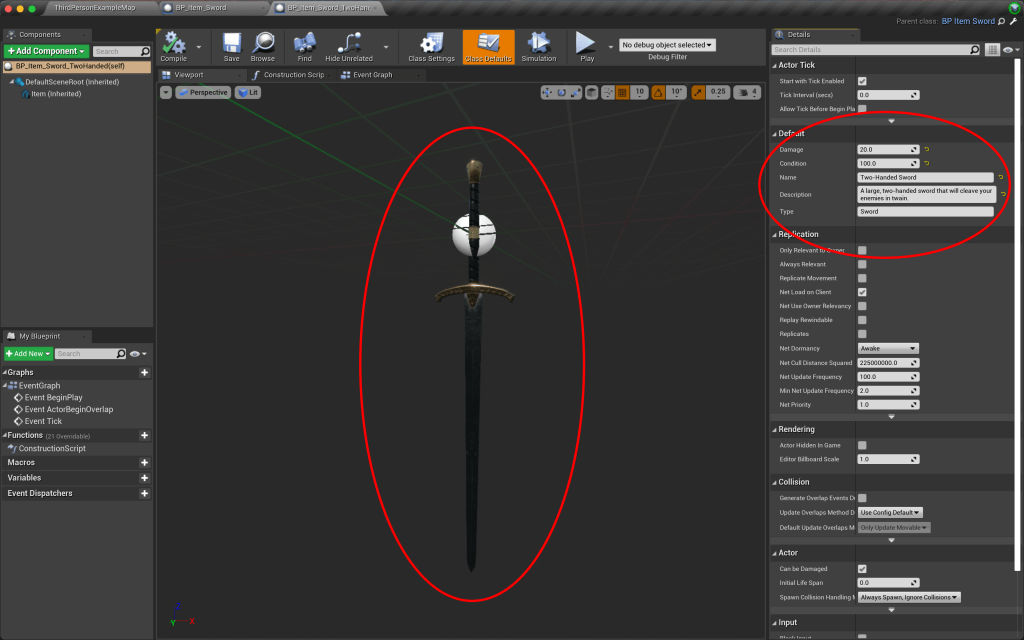
- Compile and save the blueprint.
Step 4: Derived Class: Short Sword Actor
- Now we can create another derived class of the type “BP_Item_Sword” and name it to “BP_Item_Sword_Short”. This item will have different variable settings and a different static mesh, as you can see.

Next Steps…
- Now let’s say we want to create another type of item that is not a sword. If we create another child blueprint class from the “BP_Item” parent class, we can rename it to “BP_Item_Food”. It will inherit the “Name”, “Description”, and “Type” variables from the “BP_Item” class, as well as a static mesh component, but not the sword specific variables. Then, instead of adding “Damage” and “Condition”, we can create a variable called “AddHP” that will add HP to your character, or a variable called “Freshness” which causes the food to go bad over time and will hurt you instead of healing you. Hopefully you can see the power of using inheritance.

Benefits of the Item Hierarchy:
- Reusability: By defining common properties and behaviors in the Item Actor class, you can reuse this code for various types of items throughout your game. This saves time and reduces the chances of introducing bugs when implementing similar functionalities.
- Modularity: The hierarchy allows you to encapsulate and extend functionality as you move up the inheritance chain. Each derived class builds upon the previous class’s capabilities while adding its own specific features. This modular approach promotes scalability and ease of maintenance.
- Clarity and Organization: With the hierarchy, you have a clear structure that visually represents the relationships between different items. This makes it easier to understand and locate specific functionality within the codebase, leading to better collaboration and improved development speed.
Utilizing class inheritance in Unreal Engine can significantly enhance your game development process. By creating a hierarchy of related classes, you can leverage code reusability, promote maintenance and scalability, and maintain a clean and organized project structure. Embrace the power of class inheritance and unleash the potential of your game development endeavors in Unreal Engine.

Leave a comment